modl.ai
Level Configuration

modl:test plots your bot’s movements onto an image of your level that you receive with your report.

When you upload a build to the modl platform, each level needs to include an image and a level load command line argument.

Note: If your game uses a client / server setup and the server controls how your game’s levels are loaded, enable For Game Server.

There are three ways to capture a level image:

  • Capture an image of all the scenes in build settings.
  • Capture an image for one scene.
  • Capture a custom image.

Capture all of the scenes in build settings

You can capture images for all of the scenes in your build settings. If you don’t use scenes to load your levels you need to use semi-automatic capturing to capture one image at a time for each scene. For more information refer to Capture an image for one scene.

To capture an image for all of the scenes in the build settings window, use the following the steps:

  1. Add your scenes to your project’s build settings.
  2. Go to modl > Level Configuration.
  3. Select +
  4. Choose Capture All Scenes in the Build Settings
  5. Choose a lighting type and pixel density for your image. For more information about lighting type options, refer to Choose a lighting type.
  6. modl:test captures an image for each scene in the build settings and presents it in the Level Configuration window.
  7. For each image, go to Level Load Commands and add a command line argument to tell the modl.ai platform which level to load. For an example of a level load script, refer to Test multiple scenes in one build.

Capture an image for one scene

To capture an image for one scene at a time in your project, use the following steps:

  1. Load the scene you want to capture an image for.
  2. Go to modl > Level Configuration.
  3. Select +
  4. Choose Capture Current Scene.
  5. Choose a lighting type and pixel density for your image. For more information about lighting type options, refer to Choose a lighting type.
  6. modl:test captures an image of the current scene and presents it in the Level Configuration window.
  7. Go to Level Load Commands and add a command line argument to tell the modl.ai platform which level to load. For more information, refer to Test multiple scenes in one build.

Capture a custom image

If you don’t want to use automated capturing to capture a level image, you can use the Level Image Capturing window to capture a custom image. Capturing a custom image is useful if you want to capture specific aspects of a level or a large level image.

To capture and customize an image with the Level Image Capturing window, use the following steps:

  1. Go to modl > Level Utils> Capture Custom Level Image or Section
  2. In the Level Image Capturing window, use the View Direction, Orthographic size and Offset to position and capture your level. The Level Image Capturing window inherits from the scene view window. The scene view gizmos can be ignored.
  3. Enter a level name.
  4. Select Capture
  5. If you want to capture and merge multiple images, select Auto Merge Captured Sections.
    1. If you want to manually merge images, use the following steps:
      1. go to modl > Level Utlis > Merge Captured Level Sections.
      2. Select the images you want to merge.
      3. Name your merged level.
      4. Select Merge all selected files

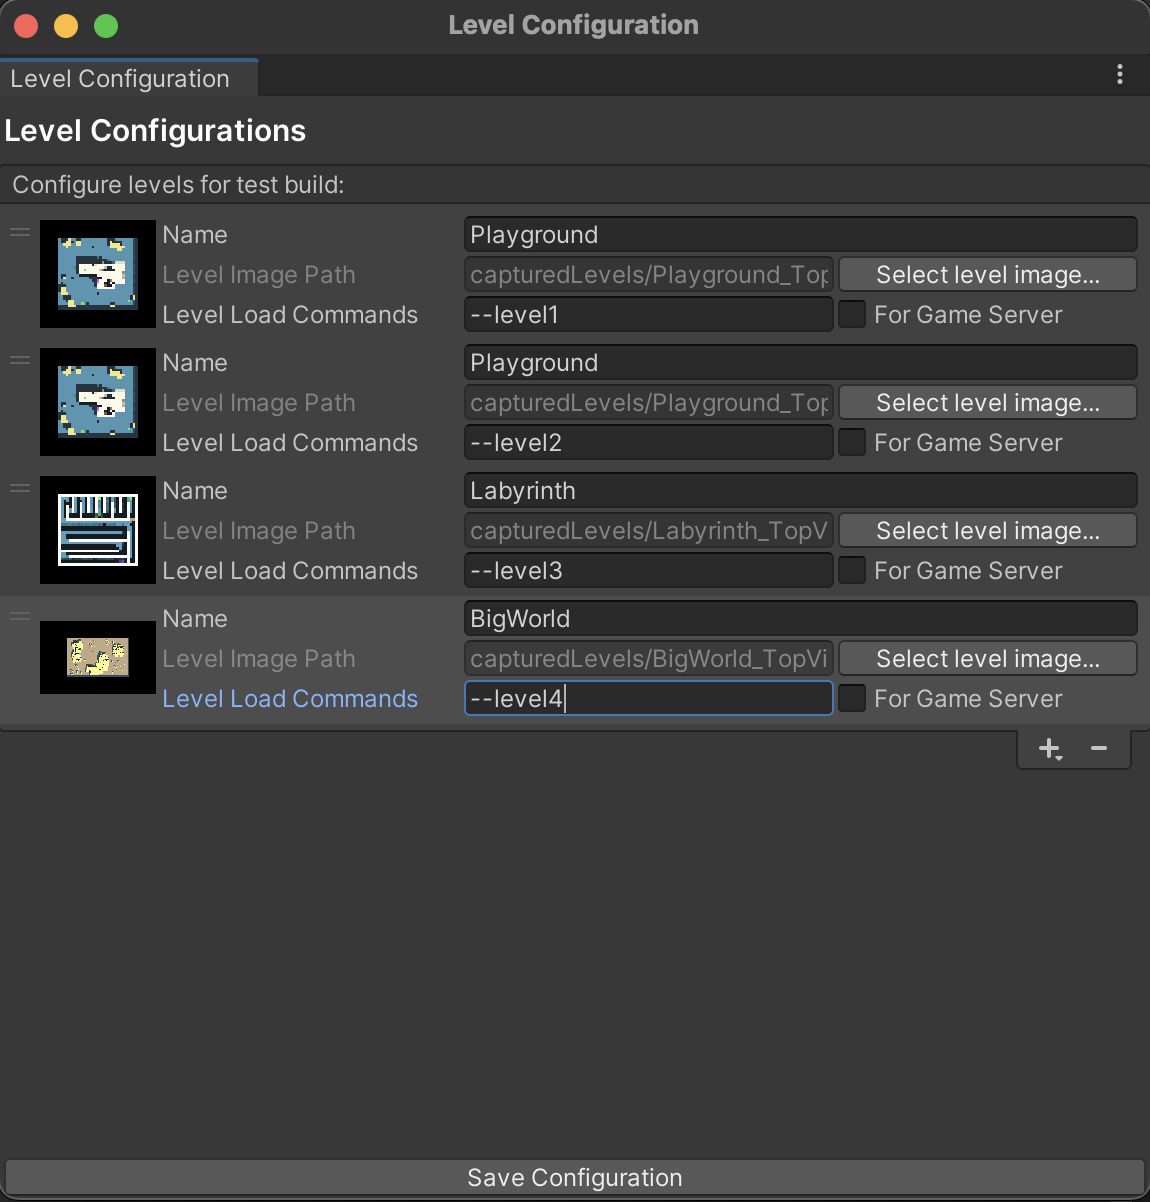
You must add your level images to the Level Configuration window. To do this, use the following steps:

  1. Go to modl > Level Configuration
  2. Select +
  3. Select Add Empty Row
  4. Add a level name
  5. Select Select Level Image
  6. Choose a level image
  7. For each image, go to Level Load Commands and add a command line argument to tell the modl.ai platform which level to load.

Choose a lighting type

When you capture an image, you can select a lighting type so that you can choose how you see your level in the platform reports. You can also choose a pixel density and resolution size, which sets the quality of the image.

You can choose to use the in-game lighting or the scene view lighting.

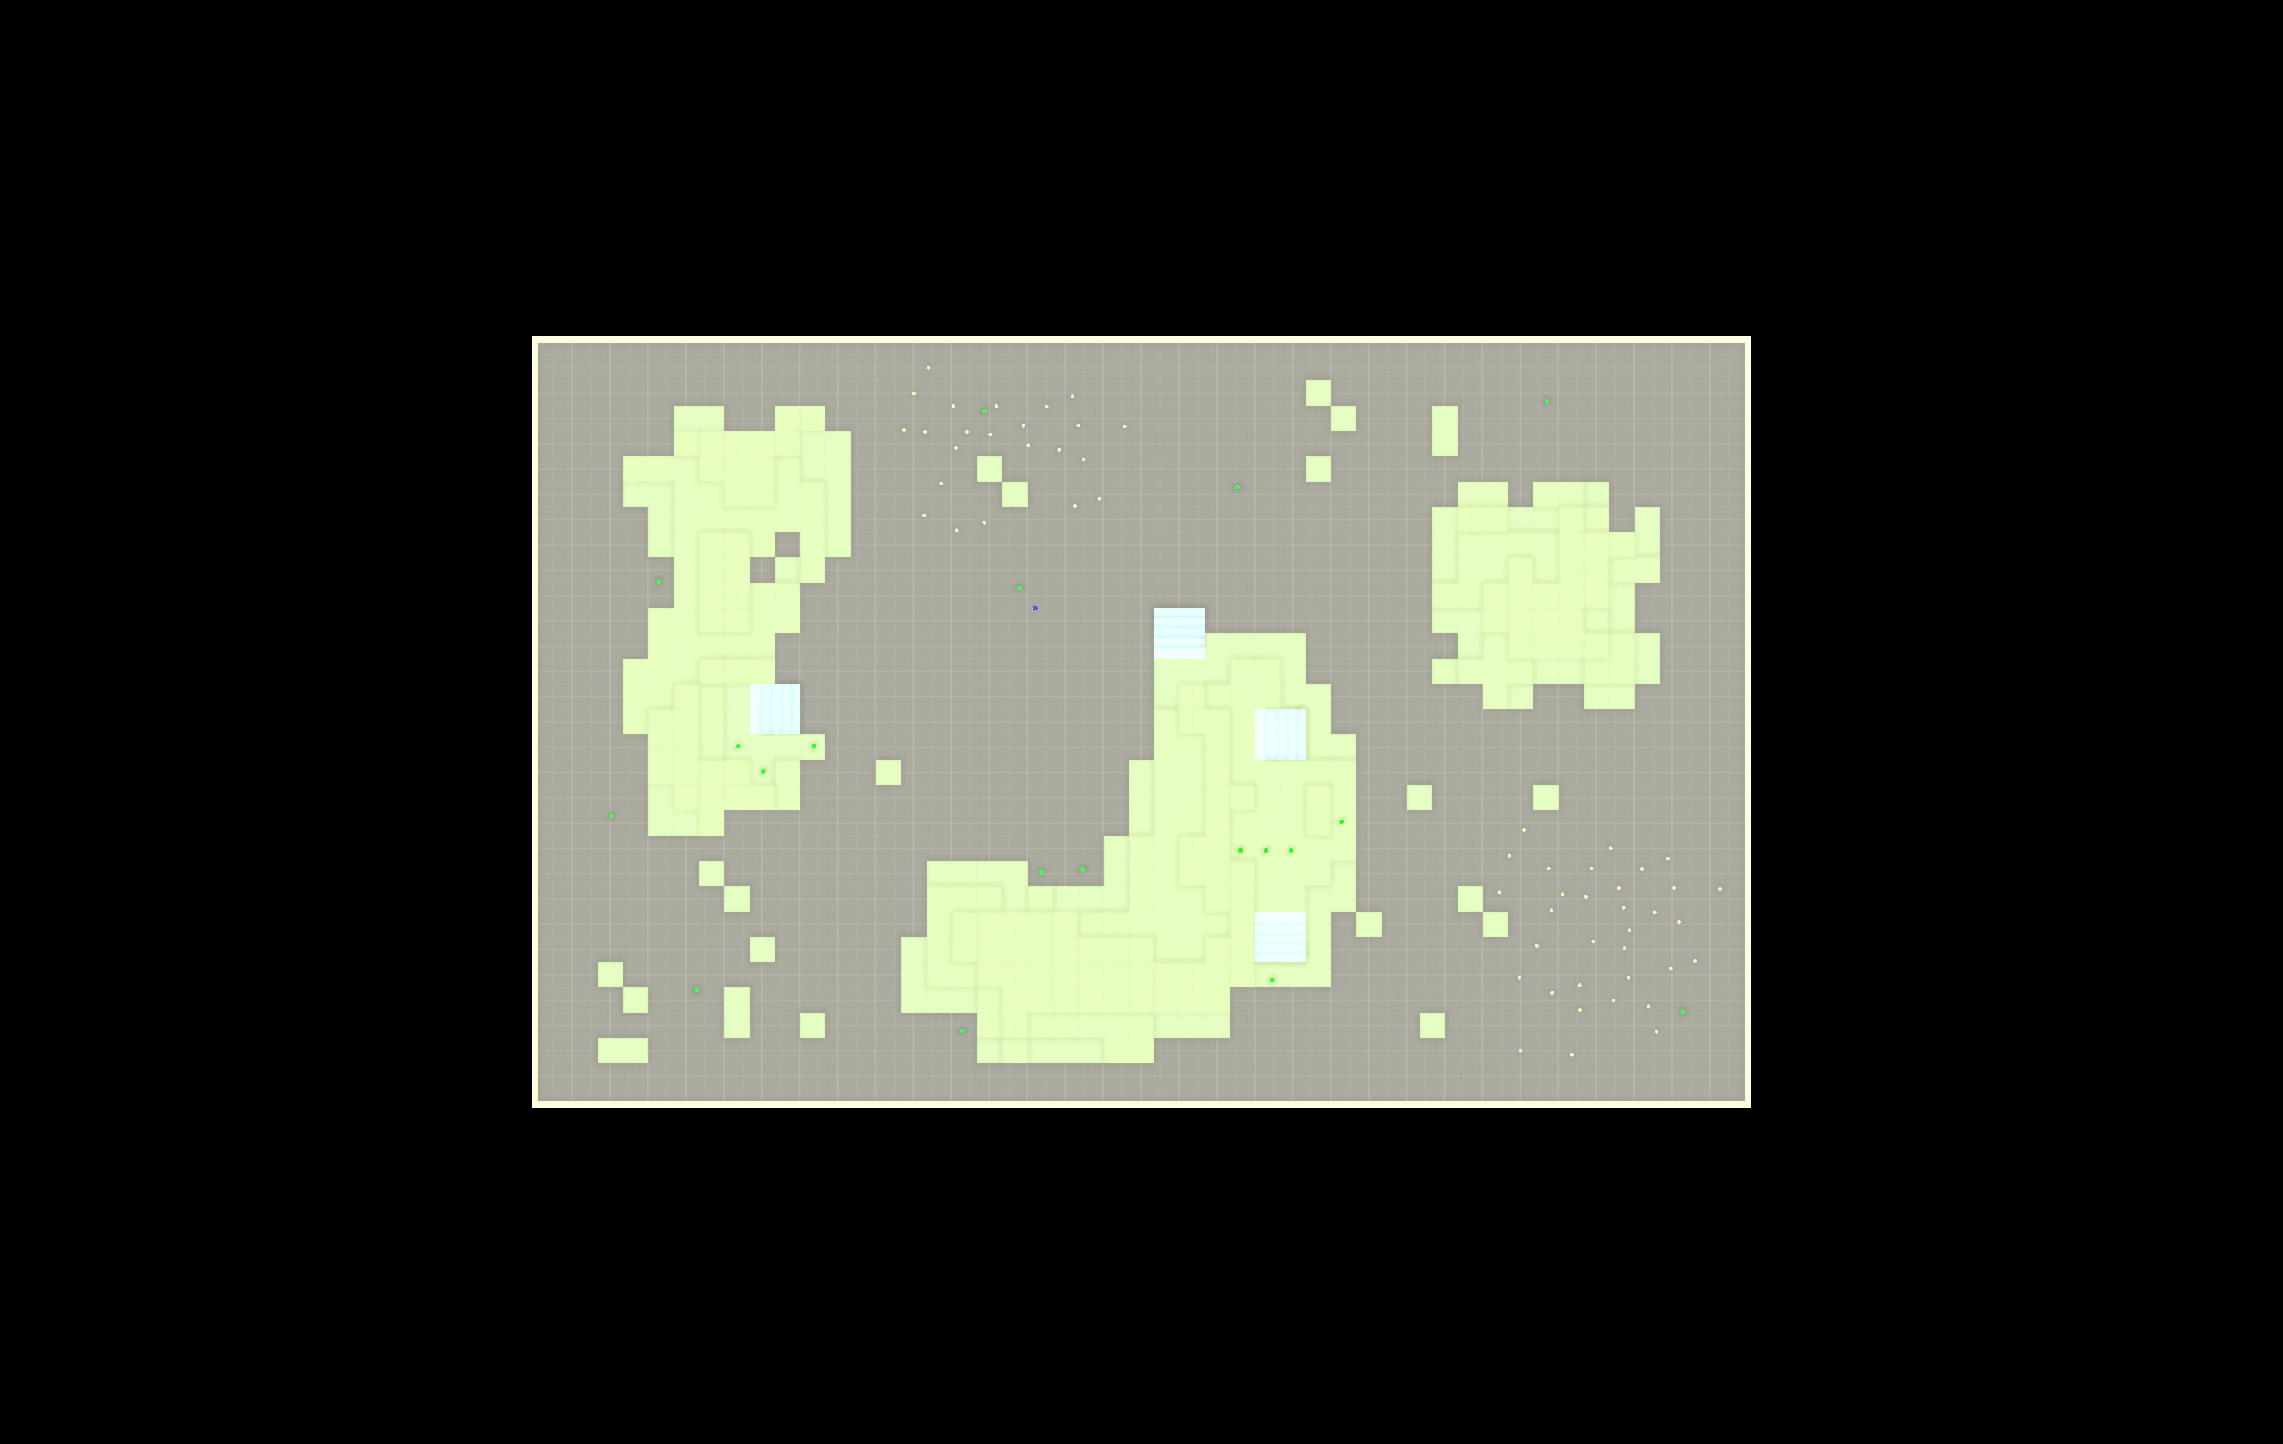
Choose Using in Game Lighting to capture an image using the lighting setup in the scene. The following image shows an example of an image captured with in-game lighting:

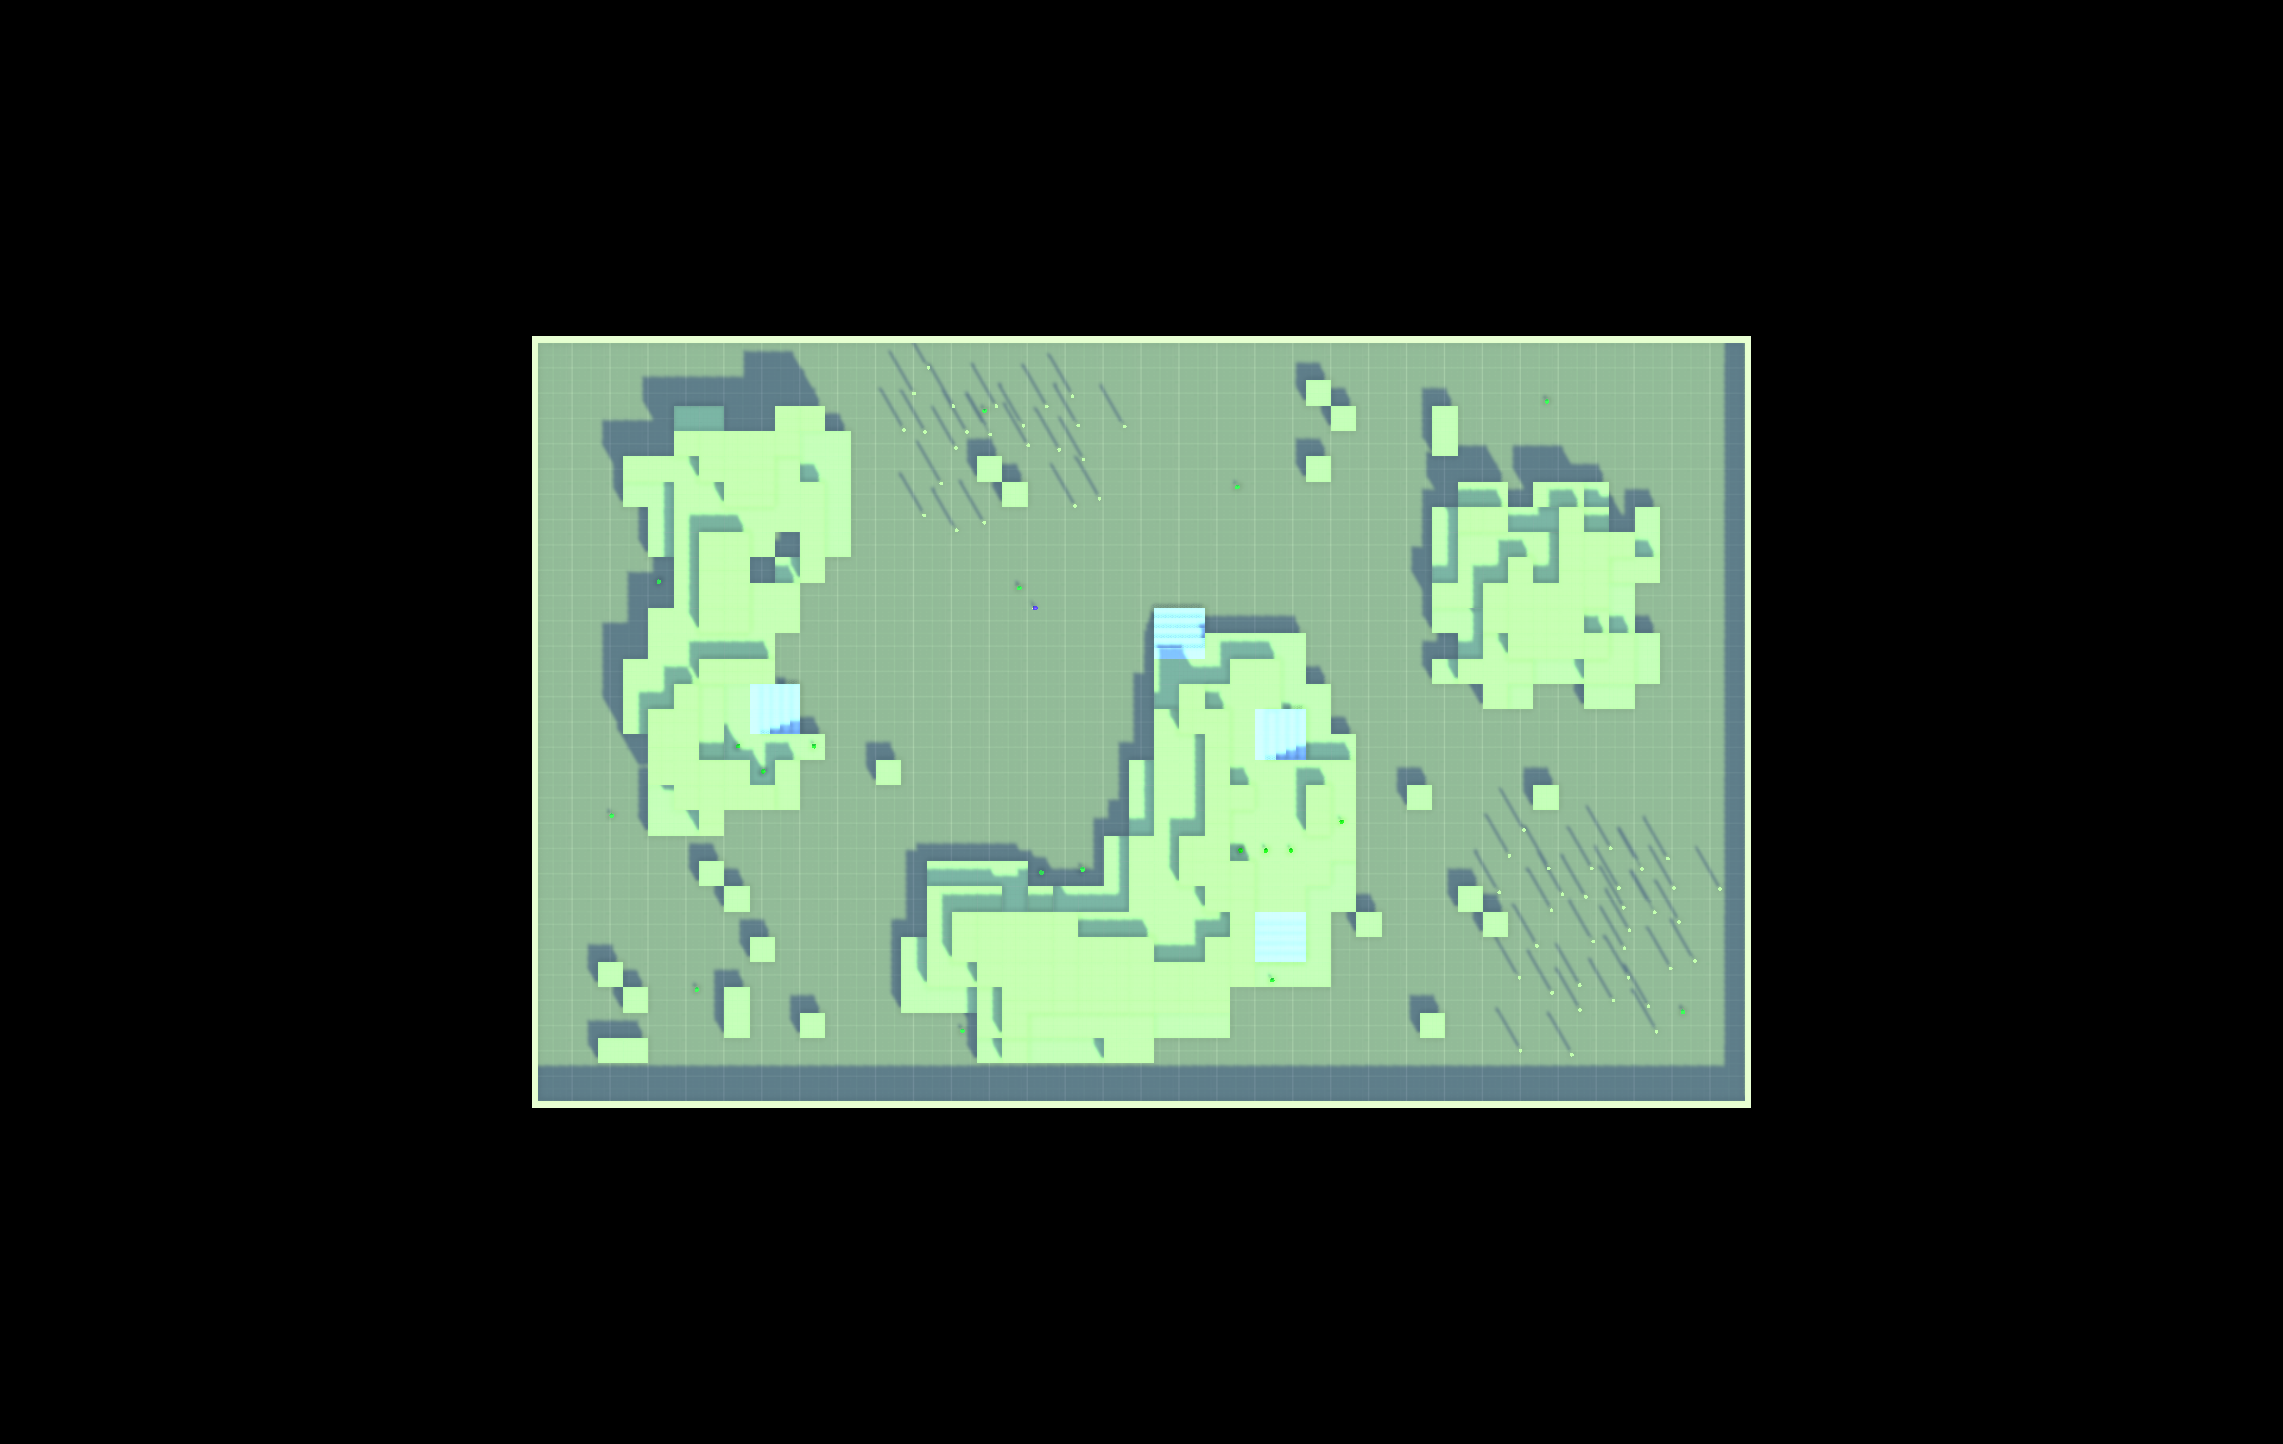
Choose Using Scene View Lighting to capture an image with a direct light added to the camera. The camera light illuminates the scene from above. The following image shows an example of an image captured with scene view lighting: